I used to subscribe to a super awesome monthly kit club produced by the company Button Farm. If you haven't heard of it, check it out here, it's fabulous and is always full of AMAZING and super great quality products.
I am finally getting around to actually doing (and posting) the projects from the kit and just had to share the amazing cards (and bags) I was able to make out of just ONE kit. And I had enough scraps leftover to make at least 6 more cards (which I used to make wine tags previously posted about).
Thanks for looking! Do you subscribe to any monthly kits/clubs for paper crafting? If so, share which one in the comments, I'd love to check them out!
Showing posts with label crafts. Show all posts
Tuesday, November 20, 2012
Saturday, November 10, 2012
DIY Chalkboard Labels
I ordered some adorable chalkboard labels from a gal on Etsy with labeling my kitchen jars in mind. Much to my dismay the labels were too large for the jars and bubbled and didn't allow me to use them. Instead of ordering more and waiting around to receive them, I decided that I can just make my own!
I purchased some chalkboard vinyl from my local Hobby Lobby store for about $7.00 for a big roll. I cut off a piece that was the size that I wanted to use and went through all of my Cricut cartridges looking for the right label design. I found the perfect one on the Storybook cartridge which I used to make these 3" long labels. I just LOVE how they turned out! ps: the jars were 50% off at Hobby Lobby right now too!
ps: my new FAVORITE find are chalkboard markers which write WAY better than chalk and can just be wiped off any chalkboard surface with a damp cloth or towel.
I purchased some chalkboard vinyl from my local Hobby Lobby store for about $7.00 for a big roll. I cut off a piece that was the size that I wanted to use and went through all of my Cricut cartridges looking for the right label design. I found the perfect one on the Storybook cartridge which I used to make these 3" long labels. I just LOVE how they turned out! ps: the jars were 50% off at Hobby Lobby right now too!
ps: my new FAVORITE find are chalkboard markers which write WAY better than chalk and can just be wiped off any chalkboard surface with a damp cloth or towel.
Friday, November 9, 2012
Stampin' Up Ornaments
I went to the lovely Lis Ljung's Stamp Camp a few months ago where we made the most adorable ornament (which is also featured in the most recent Stampin' Up holiday catalog). I absolutely fell in love with the ornament and wanted to make some on my own to give away as gifts this year. Problem was I didn't have pretty much any of the necessary supplies. Therefore, it was time to get creative and figure out a way to make a similar ornament with what I had on hand.
As you can see mine has different components. I don't have the die cut machine used for the original shapes, but I have the ornament punch and matching stamp set. I also used a heart stamp and punch for the interior layer. I hope you like my interpretation and thanks for looking! If you too would like to make an adorable ornament but don't have the right supplies don't get discouraged, GET CREATIVE! I would love to see what you come up with so please leave a link to your interpretation in my comments so I can check it out!
Here is the original
Here is my interpretation
As you can see mine has different components. I don't have the die cut machine used for the original shapes, but I have the ornament punch and matching stamp set. I also used a heart stamp and punch for the interior layer. I hope you like my interpretation and thanks for looking! If you too would like to make an adorable ornament but don't have the right supplies don't get discouraged, GET CREATIVE! I would love to see what you come up with so please leave a link to your interpretation in my comments so I can check it out!
Labels:
Christmas,
crafts,
DIY,
Holidays,
paper crafting
Tuesday, November 6, 2012
Post Halloween Post
So it's been a few days and I just didn't get a chance to get on here to give my post-Halloween update. We ended up having 212 kids who trick-or-treated, just a few shy of last year. We have some candy left over which means I have a stomach-ache. LOL.
We didn't dress up in costumes to pass out candy, but we did put some festive ears on.
Every year I give my husband a little Halloween treat. Think he liked it?
I decorate our front porch - this year hubby tore apart some pallets we got for free and made a fence which he painted black for me to decorate on the porch. My favorite decor of course are the jack-o-jars which are SUPER easy to make!
And I finally finished my fun wreath that I made!
Thanks for looking and I hope you all had a fabulous holiday!
We didn't dress up in costumes to pass out candy, but we did put some festive ears on.
Every year I give my husband a little Halloween treat. Think he liked it?
I decorate our front porch - this year hubby tore apart some pallets we got for free and made a fence which he painted black for me to decorate on the porch. My favorite decor of course are the jack-o-jars which are SUPER easy to make!
And I finally finished my fun wreath that I made!
Thanks for looking and I hope you all had a fabulous holiday!
Labels:
crafts,
DIY,
Fall,
Halloween,
Holidays,
paper crafting,
Thanksgiving
Monday, October 29, 2012
Halloween/Fall/Thanksgiving Decor Part 2
I am so pleased with how my holiday tree turned out! I got this lovely tree courtesy of the Junior League of Riverside. I was actually a part of the construction of the tree which we used for centerpieces for our ball 2 years ago. It's simply Manzanita branches secured in a pot using Plaster of Paris and then spray painting the entire thing silver. Quite easy. At the end of the ball we had an option of a donation for the centerpiece. You may recall I used these for my friend Caitlin's Bridal Shower which I hosted.
Anywho, I decided I will revamp the tree for each holiday (as I post them I will tag them all with the "Holiday Tree" label which you can access on the left). This is my Halloween version! It features beads from Michael's, flower balls (you can view my past tutorial here), black paper bats made on the Cricut, spider webs from the dollar tree, black paper spiders made on the Cricut, white raffia to cover the base, pumpkin ornaments that my mother passed down to me, and some cool skeletons that were actually on a garland I got at the dollar tree. I just cut the garland apart to make them individual ornaments. Oh and the cool raven at the top, also from the dollar tree. I love it so much and couldn't wait to share it with you all! Thanks for looking!! I love to read your comments, so please let me know what you think by commenting below!
Labels:
crafts,
DIY,
Fall,
Halloween,
Holiday Tree,
Holidays,
Thanksgiving
Sunday, October 7, 2012
Halloween Crafts
Been working on decorating the house and some fun Halloween/Fall crafts of late. Hoping to finish them up this week and get some photos up ASAP. Here is a sneak peek - hoping to turn this into some sort of wreath.
I can't believe it's October already! What kinds of crafts are you guys working on for the upcoming fall holidays?
Sunday, September 2, 2012
Dr. Seuss Diaper Cake
Here is a fun Dr. Seuss themed diaper cake that I made for my dear friend Amy. Amy and her husband Nathan welcomed baby Joaquin in August and I am just thrilled for them both!
Cake includes: baby bath wash, baby shampoo, diapers, pants, Dr. Seuss onesies, Horton softie, Dr. Seuss books, socks, receiving blankets, gift card, and much more!
Thanks for looking!
Cake includes: baby bath wash, baby shampoo, diapers, pants, Dr. Seuss onesies, Horton softie, Dr. Seuss books, socks, receiving blankets, gift card, and much more!
Thanks for looking!
Sunday, April 15, 2012
Football themed diaper cake
One of my bestest friends is a huge football fan and is due any day now. She and her husband decided not to find out the sex of their soon to be bundle-of-joy, making coming up with a theme for a diaper cake more difficult. I decided to do football because regardless of the sex, I know they will be a huge football fan like their mama and papa - if it's a girl we'll just add a few bows :)
Her shower was a few weeks ago and this is what I came up with.
The details - included on this cake are the following:
69 diapers
Burts' Bees baby wash
Glass bottle
1 Chargers jersey
2 Chargers pacies
2 Chargers bibs
2 pairs white socks
Pacie clip (football)
4 Chargers pennants
2 wood football decor pieces
Knit football toy
Knit football cap
Plush football toy
Brown and white striped football onesie
3 football burp clothes
football leg warmers
$25 gift card to Babies R Us
Thanks for looking!
Her shower was a few weeks ago and this is what I came up with.
The details - included on this cake are the following:
69 diapers
Burts' Bees baby wash
Glass bottle
1 Chargers jersey
2 Chargers pacies
2 Chargers bibs
2 pairs white socks
Pacie clip (football)
4 Chargers pennants
2 wood football decor pieces
Knit football toy
Knit football cap
Plush football toy
Brown and white striped football onesie
3 football burp clothes
football leg warmers
$25 gift card to Babies R Us
Thanks for looking!
Tuesday, January 17, 2012
Diaper Wreaths
I apologize for being MIA - I am trying to get back into the swing of things after a very busy holiday season. I will be posting a few posts as catch up for what's happened in my absence.
First, the day after my dear friend Caitlin's wedding I went to another dear friend, Amy's, baby shower. Due to the fact that I was crunched on time I put together a wreath rather than a cake using diapers. I had seen this idea somewhere on the internet a long time ago, but basically just created this using supplies I had on hand.
I had a straw wreath, ribbon and diapers, which I used to create the base of the wreath. I then added a stuffed pooh softie (the baby's room is pooh themed) and some other baby doo-dads (games, books and hair clips). I think for my first attempt it turned out pretty well. I am looking forward to expanding on this idea. It's a little different then the ever increasing cakes, and I'm thinking it would be easier to ship and therefore may be a better possibility for etsy sales. I recently purchased some goodies on Zulily - if you've never checked it out you MUST! It's a site that features daily deals for babies and women - up to 90% off! Check it out here. Anywho, I recently purchased a bunch of clearance items that I hope to use on future wreaths - I'm thinking a Dr. Suess themed wreath would be an adorable gender neutral gift, don't you?
Amy has since had her beautiful baby girl - so congrats are in order to Amy!
Thanks as always for looking, and for staying with my in my absence!
First, the day after my dear friend Caitlin's wedding I went to another dear friend, Amy's, baby shower. Due to the fact that I was crunched on time I put together a wreath rather than a cake using diapers. I had seen this idea somewhere on the internet a long time ago, but basically just created this using supplies I had on hand.
I had a straw wreath, ribbon and diapers, which I used to create the base of the wreath. I then added a stuffed pooh softie (the baby's room is pooh themed) and some other baby doo-dads (games, books and hair clips). I think for my first attempt it turned out pretty well. I am looking forward to expanding on this idea. It's a little different then the ever increasing cakes, and I'm thinking it would be easier to ship and therefore may be a better possibility for etsy sales. I recently purchased some goodies on Zulily - if you've never checked it out you MUST! It's a site that features daily deals for babies and women - up to 90% off! Check it out here. Anywho, I recently purchased a bunch of clearance items that I hope to use on future wreaths - I'm thinking a Dr. Suess themed wreath would be an adorable gender neutral gift, don't you?
Amy has since had her beautiful baby girl - so congrats are in order to Amy!
Thanks as always for looking, and for staying with my in my absence!
Sunday, November 6, 2011
PaperCrafter's Makeover Monday Challenge # 1 - Wine Bottle Tag
I have completed Week 1's Makeover Monday Challenge hosted by Paper Crafter's Library. Each Monday they plan to post a challenge which you can create using your supplies on hand. I loved the idea of this wine bottle tag - a perfect way to dress up a wine bottle for a birthday or hostess gift, something I regularly give.
Here is my version of the wine tag - I used my scraps from September's Button Farm kit to create this tag - I'm very pleased with how it turned out. The tag is 3x7 and is scored at the 2" mark with a hole punched in the top to easily slide over the wine bottle's neck.
Thanks for looking at my attempt, and thanks to Paper Crafter's Library for a FABULOUS challenge - I had fun and it's definitely an item I look forward to making again - fast, easy, and cute, what's not to like!?
here is the link to the original challenge
Here is my version of the wine tag - I used my scraps from September's Button Farm kit to create this tag - I'm very pleased with how it turned out. The tag is 3x7 and is scored at the 2" mark with a hole punched in the top to easily slide over the wine bottle's neck.
Thanks for looking at my attempt, and thanks to Paper Crafter's Library for a FABULOUS challenge - I had fun and it's definitely an item I look forward to making again - fast, easy, and cute, what's not to like!?
here is the link to the original challenge
Friday, October 7, 2011
Planning my best friend's bridal shower - photo of invitations
As matron of honor (wow that makes me sound old), part of my task is to throw the bride, one of my best friends by the name of Caitlin, a bridal shower. Together with the other 5 bridesmaids, we will be throwing a hopefully elegant event at my house next month.
The first step of course is sending out invitations. I saw this adorable idea from my dear friend Heather. As soon as I saw it - back in July when she originally posted it - I instantly knew that this was going to be the bridal shower invitation. I wanted to add my own flair by creating the bouquet with rosettes rather than punched flowers.
The rosettes are created by punching a circle (I used a 1" circle punch), then cutting the circle in a spiral from the outside. You then start on the outside and roll the paper all the way, and voila, a rosette!
Here is the final product (again I apologize for my horrific photography skills).
I had the pleasure of personally giving this to the bride on Wednesday night and I was pleased that she seemed to like it. I look forward to posting more about the shower as we continue to plan and create.
On a fun note - you should have seen the bridesmaids responses (most of whom are not crafters) when I sent them a photo of Heather's card and said "this is what we're making". haha. Priceless. A big thank you to Kim, Kamila, my mother and the mother of the bride for coming over on a Saturday night and helping put together 30 of these bad boys.
TGIF everyone - we're off to Vegas!
The first step of course is sending out invitations. I saw this adorable idea from my dear friend Heather. As soon as I saw it - back in July when she originally posted it - I instantly knew that this was going to be the bridal shower invitation. I wanted to add my own flair by creating the bouquet with rosettes rather than punched flowers.
The rosettes are created by punching a circle (I used a 1" circle punch), then cutting the circle in a spiral from the outside. You then start on the outside and roll the paper all the way, and voila, a rosette!
Here is the final product (again I apologize for my horrific photography skills).
I had the pleasure of personally giving this to the bride on Wednesday night and I was pleased that she seemed to like it. I look forward to posting more about the shower as we continue to plan and create.
On a fun note - you should have seen the bridesmaids responses (most of whom are not crafters) when I sent them a photo of Heather's card and said "this is what we're making". haha. Priceless. A big thank you to Kim, Kamila, my mother and the mother of the bride for coming over on a Saturday night and helping put together 30 of these bad boys.
TGIF everyone - we're off to Vegas!
Tuesday, September 27, 2011
Tutorial Tuesday - super simple pennant centerpiece
Well I am doing a tutorial today (I know I actually crafted something OMG!) - but I forgot to take photos of the steps - so it will be a written tutorial. My bad!
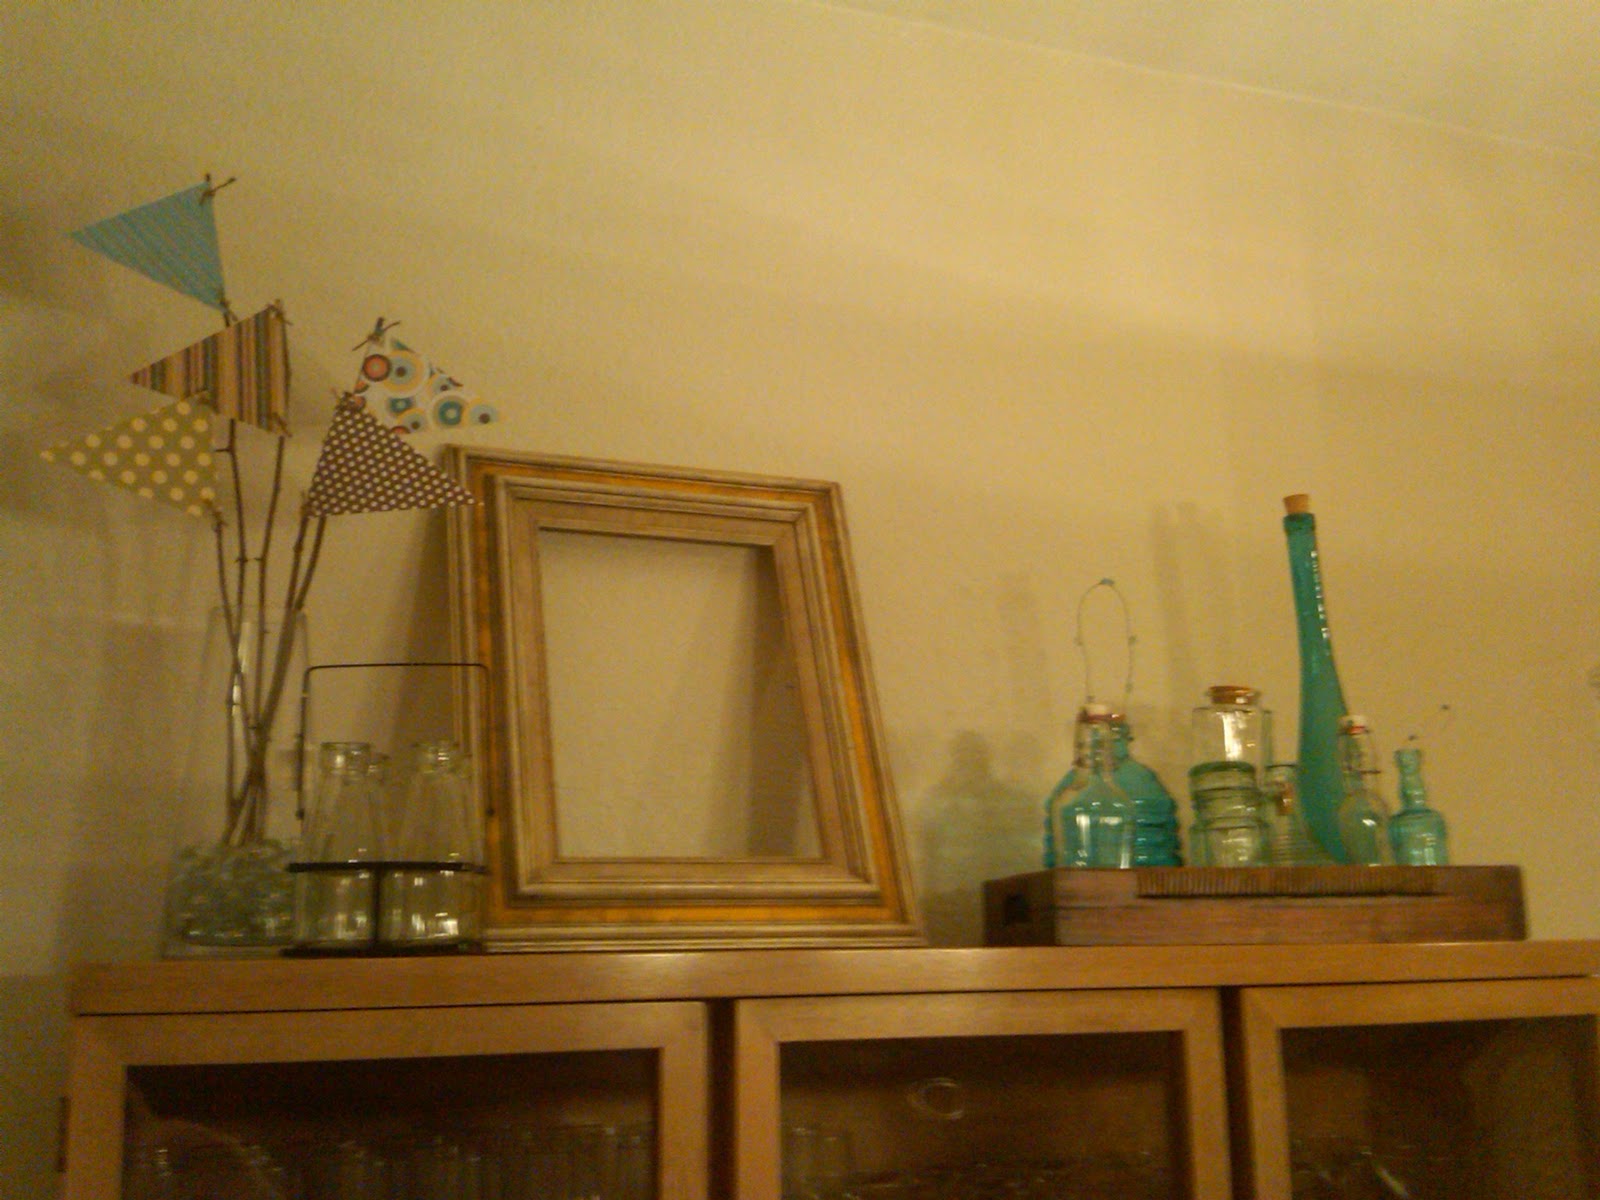
Well the top of my hutch looked like this (see below) - I didn't love the flowers as I didn't think they went, so I wanted to create something to go in its place, but still utilize the vase - something other than a floral arrangement as fake flowers are not my fave.
BEFORE
I saw a photo online which led me to the idea of pennants on sticks, so here is the after photo below (I did this quickstyle last night). What do you think, do you like the before or after better?
AFTER
SUPPLIES
- 5 complimentary patterned papers 6x6 or larger will work for this project - keep in mind that if you are using this as a centerpiece rather than against a wall, the papers will need to be double sided
- 5 twigs/sticks - i liked the natural look of the twigs - i purchased a bundle of twigs at michaels, cut off the wire holding the bundle together and trimmed them to the size i wanted them to be
- wire cutters or similar - basically something heavy duty to trim your twigs so they will be the height you desire
- vase
- something to fill the bottom of your face with - i used clear marbles, other ideas are stones, nuts, seeds, moss, etc.
- cropodile or hole punch
- twine or ribbon
- paper cutter
STEP ONE: cut your paper too be 4.5" by 5.5". Then mark with a pencil on the 4.5" side a dot at the 2.25" mark - angle your paper cutter to cut from one corner to the 2.25" mark you just made on both sides to create a pennant - I chose this size due to the size of my vase - you may make smaller or larger depending on your vase size - i recommend the width being 1" bigger than the height as I feel that made the proportions look correct.
STEP TWO: use your cropodile or hole punch to punch a hole in both corners of your straight edge
STEP THREE: use your twine to tie both corners to your twig/stick
STEP FOUR: have 3 of your flags point one direction and 2 point the other - trim your twigs to desired varying heights and display in your vase as desired.
VOILA! Easy cheesy :) Hope you enjoyed the super simple tutorial.
** I will attempt to get a close-up photo tonight and add to this post as requested.
Let me know what you think of my hutch - do you like the flowers or pennants best?
Sunday, September 25, 2011
Past Projects - 4th Edition
I made these birthday cards with some spring designer series paper from Stampin' Up. These cards might possibly be my favorite cards that I have ever made. I think they are. Anywho, thought I would share them as I am sharing some of my favorite past projects with you all. Enjoy!
** I am sorry the photo is such poor quality!
Saturday, September 24, 2011
Past Projects - 3rd Edition
More! haha. At least I have an archive of photos to choose from so I have SOMETHING to share. I am hoping to start crafting soon - I swear!
This is a project that I made in 2010 for a Valentine's Day gift exchange - the catch was the gift had to be home-made. I made this accordion style mini album/display. It was just a very simple mini album with not a lot of bling as I didn't want to over-embellish it without knowing the recipients style. I still was pleased with how it turned out :)
Front Cover
Front side
Back side (the white squares were for the recipient to replace with 3x3 photos of her choosing)
Thanks for looking!
This is a project that I made in 2010 for a Valentine's Day gift exchange - the catch was the gift had to be home-made. I made this accordion style mini album/display. It was just a very simple mini album with not a lot of bling as I didn't want to over-embellish it without knowing the recipients style. I still was pleased with how it turned out :)
Front Cover
Front side
Back side (the white squares were for the recipient to replace with 3x3 photos of her choosing)
Thanks for looking!
Thursday, September 22, 2011
Past Projects - 2nd Edition
Yet another post highlighting some of my favorite past projects while I continue to be lazy and not have anything current to post.
Here are some pinwheel cards I made a while back - they were the easiest things I've ever made - and I thought a great card for a male. Men's cards are hard to make sometimes, so I was thrilled that I could whip these out quickstyle.
As always, thanks for looking!
Here are some pinwheel cards I made a while back - they were the easiest things I've ever made - and I thought a great card for a male. Men's cards are hard to make sometimes, so I was thrilled that I could whip these out quickstyle.
As always, thanks for looking!
Monday, September 19, 2011
Past Projects
Since I have been a major slacker in the crafting department lately, I thought I would share photos of some of my past projects so that you could have some eye candy despite my slacker status.
This is a set of 10 cards I made all using the same distressed flower idea - all 10 are different and could be given or sold as a card set. The idea is SUPER simple. I had fun making them and think they turned out too cute. I made these back in early 2010 and have since given all 10 of the cards out. I do obviously need to work on my photo-taking skills still (oops).
Thanks for looking. I promise I will be crafting soon - I'm almost done organizing my craft supplies that have been packed in boxes in my garage for over a year (when we bought the house). After I organize I will finally be able to access my tools and junk so I can get started :)
Happy Monday all!
This is a set of 10 cards I made all using the same distressed flower idea - all 10 are different and could be given or sold as a card set. The idea is SUPER simple. I had fun making them and think they turned out too cute. I made these back in early 2010 and have since given all 10 of the cards out. I do obviously need to work on my photo-taking skills still (oops).
Thanks for looking. I promise I will be crafting soon - I'm almost done organizing my craft supplies that have been packed in boxes in my garage for over a year (when we bought the house). After I organize I will finally be able to access my tools and junk so I can get started :)
Happy Monday all!
Thursday, September 1, 2011
The problem with crafting.....
To craft or not to craft (this weekend), that is the question. The problem (for me) with crafting is that it takes like 3.4 hours for me to get all of my gear out of the storage room guest room. Then, after I get it all out, I need a nap of course. After my nap, its usually time to put it all away. Sigh. It would be so much easier if I just had a place (other than the dining room table) that I could craft and just leave off of my junk out.
We have a dream of having an office/craft room someday. In fact, my amazing husband has made great progress. After having lived in our current home for just over one year, he finally tore out the nasty carpet in the would be craft/office room and we stripped the three (yes THREE) layers of wallpaper a few months ago. Now we need to purchase primer and paint, do a little drywall repair, paint, and then purchase new flooring. We are thinking the laminate that we have in our master bedroom which we have grown to love and it appears to hold up really well.
The problem with all of this... it costs money. Currently hubby and I are working the Dave Ramsey plan and are on baby step 2 - snowballing our debt. This means that ALL extra money is going towards paying off our debt and that we are not spending ANY money on things that we want - only necessities that we need like food, gas, and our other bills (mortgage, utilities, phone, etc.). The goal is to have all debt including vehicles (excluding the house) paid off within two years. Ramsey says that if you can't pay it off in two years you can't afford it. So, two years from last month we must have paid off all of our debt. THEN we will have the money to splurge a little before we commence baby step three, saving 3-6 months of expenses in an emergency fund.
So... what I'm getting at is, I expect to have my craft room complete and be up and crafting approx. Jan. 2014. Stay tuned! HA!
We have a dream of having an office/craft room someday. In fact, my amazing husband has made great progress. After having lived in our current home for just over one year, he finally tore out the nasty carpet in the would be craft/office room and we stripped the three (yes THREE) layers of wallpaper a few months ago. Now we need to purchase primer and paint, do a little drywall repair, paint, and then purchase new flooring. We are thinking the laminate that we have in our master bedroom which we have grown to love and it appears to hold up really well.
The problem with all of this... it costs money. Currently hubby and I are working the Dave Ramsey plan and are on baby step 2 - snowballing our debt. This means that ALL extra money is going towards paying off our debt and that we are not spending ANY money on things that we want - only necessities that we need like food, gas, and our other bills (mortgage, utilities, phone, etc.). The goal is to have all debt including vehicles (excluding the house) paid off within two years. Ramsey says that if you can't pay it off in two years you can't afford it. So, two years from last month we must have paid off all of our debt. THEN we will have the money to splurge a little before we commence baby step three, saving 3-6 months of expenses in an emergency fund.
So... what I'm getting at is, I expect to have my craft room complete and be up and crafting approx. Jan. 2014. Stay tuned! HA!
Tuesday, August 9, 2011
Tutorial Tuesdays - a diaper cake
I know that I have posted diaper cake ideas in the past - but as I was making my dear friend, Christy's, diaper cake back in June, I decided to take a few photos along the way and do a mini tutorial for all of you faithful readers :)
Supplies
1 large bottle of johnson and johnson baby powder - or any brand, I just use this as its a preferred brand among most moms
A small round medium sized object such as a medium sized bottle, or bath wash, etc. for your top layer
2 large glue dots, foam adhesive, etc. to adhere the layers
1 box (80 count) of Pampers Swaddlers Size 2 - I use these because they have the least color on them so that your cake appears white, and most people get size 1 as gifts, so this way you know yours will be used for sure - both ladies I have made cakes for have thanked me for giving size 2 instead of 1.
Cake plate - cardboard or plastic, 10" or 12"
Rubberbands - lots of them, the normal size, not super large or small, brown so it doesn't draw attention just in case your cover doesn't cover them all the way
6 extra large rubber bands to hold each layer together
pearl head pins (this is what I use to pin the items on)
topper - something to top your "cake" with to tie in your theme
1 bag of raffia (any color) - I use this to add a little more texture to my cake by putting it between each layer.
Ribbon/receiving blankets/designer paper, etc. to cover your rubberbands - I use a combo of ribbon and receiving blankets, but may try paper in the future
goodies - goodies to adhere to your cake, they should be small, socks, pacifiers, gift cards, small toys, washclothes, etc. Anything too large will distract from your cake and cover your masterpiece!
Instructions
1) Adhere your powder to the cake plate using a glue dot or foam adhesive. Adhere your smaller object such as a bottle on top of the powder bottle using the same thing.
2) Roll your diapers. Diapers should be laid out flat on their back sides (like you were going to place it on a baby) and rolled tightly from one end to the other. Then secure the roll by wrapping a rubberband around the middle of each diaper - do not wrap too snuggly so that it distorts the shape of your diaper.
3) Start with your base layer by placing diapers one by one in a circle around the powder bottle - diapers should all face the same way, seam in (towards the powder). Your bottom layer should have 3 layers of diapers (so 3 rings around the bottle). Secure each ring should be rubberbanded using one of the extra large rubberbands.
This photo is an example of one ring around the powder bottle for my base layer.
4) Once your base layer is completed, begin your second layer, which will have 2 rings. (Note, It also helps to drink a margarita while you assemble these assuming you are not expecting yourself, as you may notice in the back left of my photo, HA!).
Base and second layer assembled.
5) Assemble the third layer as described above with only one ring of diapers.
6) Here is where I add the raffia between by base and second layers and second and top layer. I find it easier to add at this point so that you can tuck it in and it easily stays in place without any additional adhesive or supplies.
7) You know will cover the rubberbands by wrapping either ribbon, decorative paper, receiving blankets, etc., or a combination thereof around each layer. Generally by bottom layer is too large for the average receiving blanket, so I use ribbon on the bottom layer.
8) Decorate your "cake" with the goodies by adhering them with pearl head pins or ribbons. Make sure they are small and do not detract from your cake.
9) Add your cake topper and voila! DONE!
I hope you all enjoyed my mini tutorial, and feel free to check out my girls version of my diaper cake here.
And a bonus photo of the shower invitation I made for the same shower, which was rubber ducky themed - simple but fun (IMO):
Oh and more photos from the shower taken by other people who attended:
My friend Jen made the cookies, aren't they adorable!?
I also made the little silverware holder. Geez I love my Cricut.
Labels:
baby,
crafts,
diaper cake,
DIY,
Tutorial Tuesdays
Wednesday, April 13, 2011
Spring Wreath (my 1st wreath)
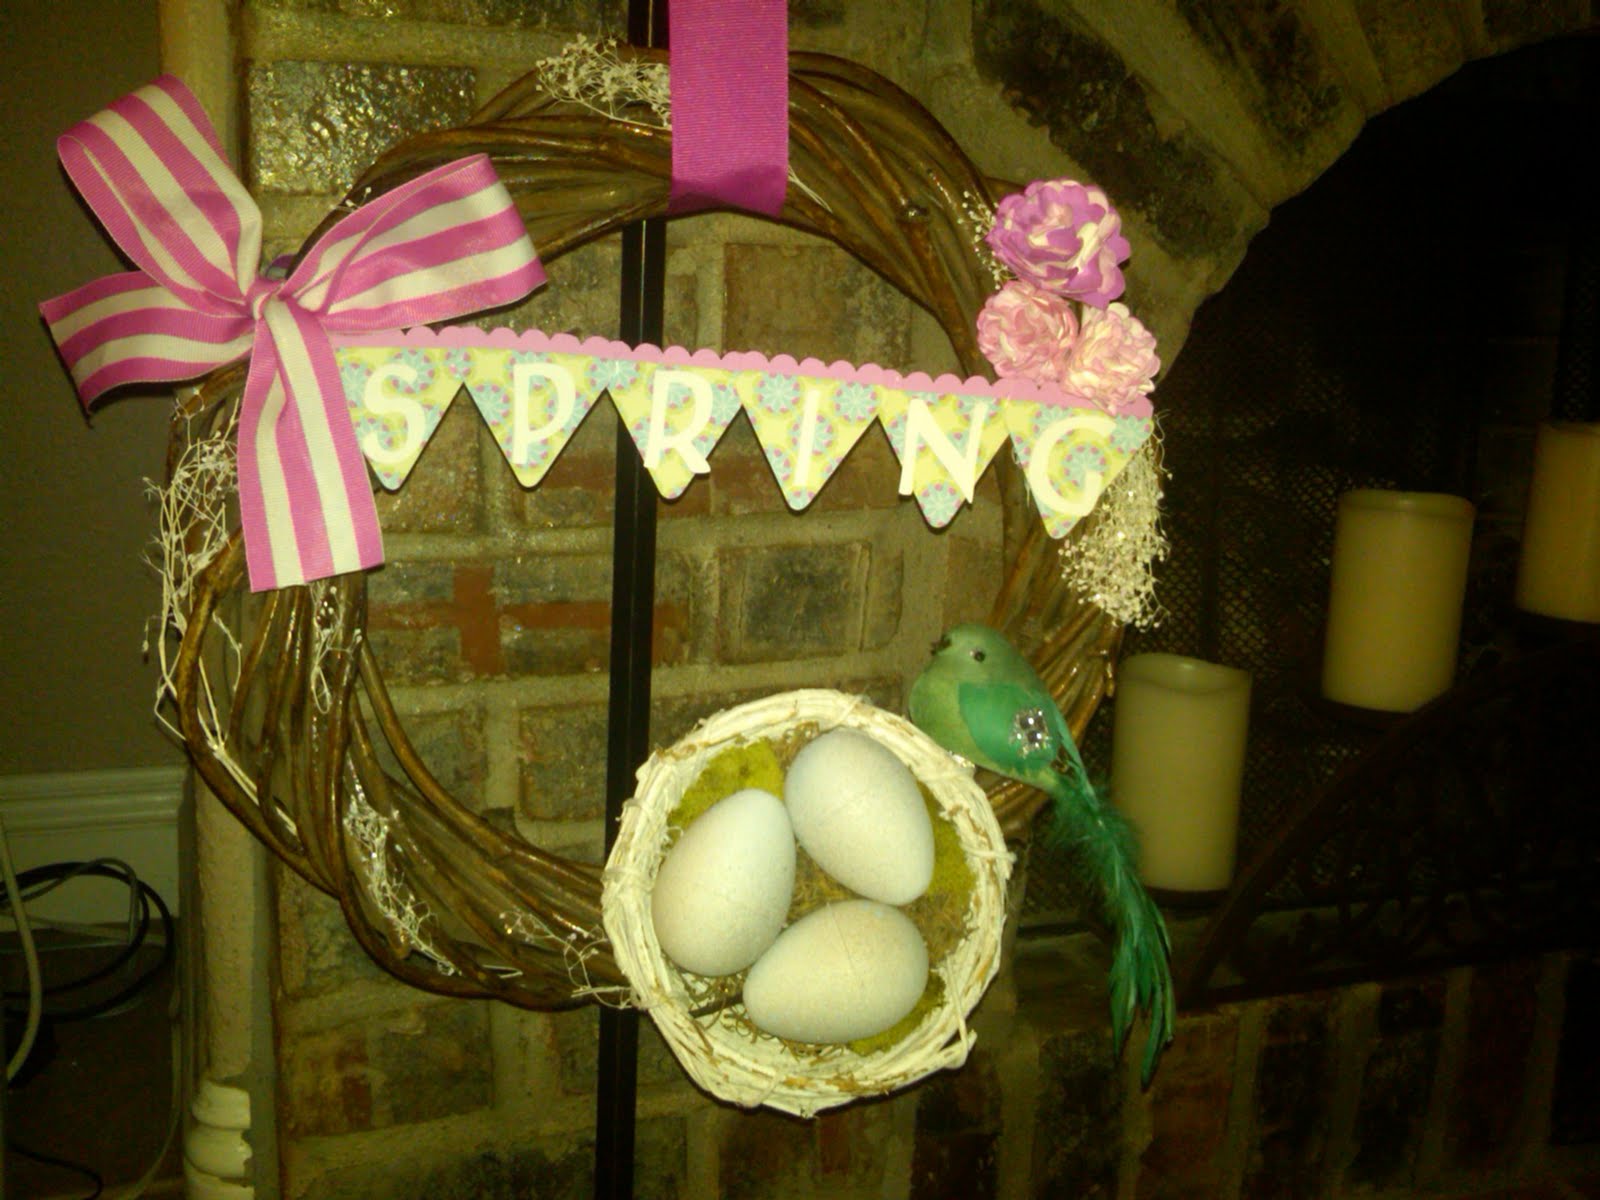
So this is my first real attempt at making my own wreath. It turned out all right. I think I definitely have room for improvement though. It does make me laugh that the eggs are larger than the bird, whom I have lovingly named Bridgett. Thanks for looking!
2 special shout outs:
My inspiration from Craftomaniac
and
The Robins Eggs tutorial from Viv Spot
Monday, April 11, 2011
Another Moss Initial and a Burlap Banner
So my friend came over and stole picked up the moss initial that I had made for her which I had lovingly had on display at my house in the meantime (which I posted about here). I decided it was high time that I make my own - but I decided to keep it a little more simple and hang it in my dining room on my new metal wall display we recently put up.
Here it is all by it's lonesome. Well I also have a frame hanging on the bottom that I picked up on clearance but I don't know if I love it yet.
Well it looked lonely so I decided to make a simple burlap banner using a roll of burlap I had picked up at a yard sale. I'm not thrilled with how it turned out, I think it needs more embellishments, but it's a start and at least adds a little more pizazz to my dining room.
The sign was simple - I printed a graphic of an isosceles triangle on my computer with the dimension that I wanted, I then cut that out and used it as a guideline to cut my burlap pieces. I used a cricut cartridge to cute a scalloped circle and then a smaller circle and letters.
So now, my fellow readers, I need your help - how can I improve upon this sign so that I love it? Please and thank you :)
Here it is all by it's lonesome. Well I also have a frame hanging on the bottom that I picked up on clearance but I don't know if I love it yet.
Well it looked lonely so I decided to make a simple burlap banner using a roll of burlap I had picked up at a yard sale. I'm not thrilled with how it turned out, I think it needs more embellishments, but it's a start and at least adds a little more pizazz to my dining room.
The sign was simple - I printed a graphic of an isosceles triangle on my computer with the dimension that I wanted, I then cut that out and used it as a guideline to cut my burlap pieces. I used a cricut cartridge to cute a scalloped circle and then a smaller circle and letters.
So now, my fellow readers, I need your help - how can I improve upon this sign so that I love it? Please and thank you :)
Subscribe to:
Posts (Atom)