Showing posts with label home renovation. Show all posts

Tuesday, October 16, 2012

Halloween/Fall/Thanksgiving Decor Part 1

My living room is all ready for the upcoming holidays and I just couldn't wait any longer to share some pics!

My mantle is all ready for Fall/Thanksgiving.  I finally finished the 3D paper pumpkins that are on top of the finials.  


And finally, the shelves over my couch have received a spooktacular makeover for Halloween! Funny story about the purple tilted candles.... those were normal purple candlesticks that I packed away in my Fall bins and put in the attic after taking them down after last year's season.  I put them in the Frankenstein vase (which you can also see in the photo).  Well, silly me didn't even consider that because it gets hotter than Hades here in Southern California, that they would melt.  So when I unpacked them the vase was on its side with the candles melted to the side of the vase and leaned over the top of the vase.  I thought it was quite perfect for the Halloween holiday.  However, I am quite worried that it won't be nearly as awesome for my Christmas candles which have also been in the attic for nearly a year.  Sigh.  LOL.


The shelves over my TV have been revamped for Fall/Thanksgiving.  Here is a before and after shot.


Most of my decor were garage sale finds, some of it was handed down to me by my mother, and very few of the items were actually purchased by me at a store or handmade.  Thanks again for looking and check back soon for more Holiday decor!

Wednesday, September 28, 2011

Threw together some bathroom decor

So I'm having a group of ladies over tonight and my guest bathroom was empty except for a hand-me-down yellow hand towel from my mother and some bamboo bathroom accessories we got for the wedding - there was absolutely no element of decor.

Resources are limited right now as we are working the Dave Ramsey plan of paying down our debt - but I was able to throw together a little bit of an upgrade (last night) for tonight's party by only purchasing new towels and yard sale hunting the past few months for all of the decor.

Here is the best full shot I could get - small spaces are hard to photograph.


Close up of the vanity - the hurricane, small glass jar, shells in hurricane, shells in small jar and white shell came from five (5) different yard sales over the past few months - I did buy the hand napkins.


Close up of the art - my dear friend Stacey found a blue starfish graphic online which I blue up, turned brown, and added 3 different complimentary backgrounds to to create my new bathroom art - I printed each one on cardstock I had in my inventory and framed them in 3 white washed frames I had found at yet another yard sale. 


Thanks for looking - I know its nothing special - but it shows that you too can do a whole new look for your bathroom on the cheap - someday we want to redo the sink, vanity, mirrors, toilet and shower of this guest bathroom.  But that will be a few years from now, or when we hit the lotto! :)

Tuesday, September 27, 2011

Tutorial Tuesday - super simple pennant centerpiece

Well I am doing a tutorial today (I know I actually crafted something OMG!) - but I forgot to take photos of the steps - so it will be a written tutorial.  My bad!

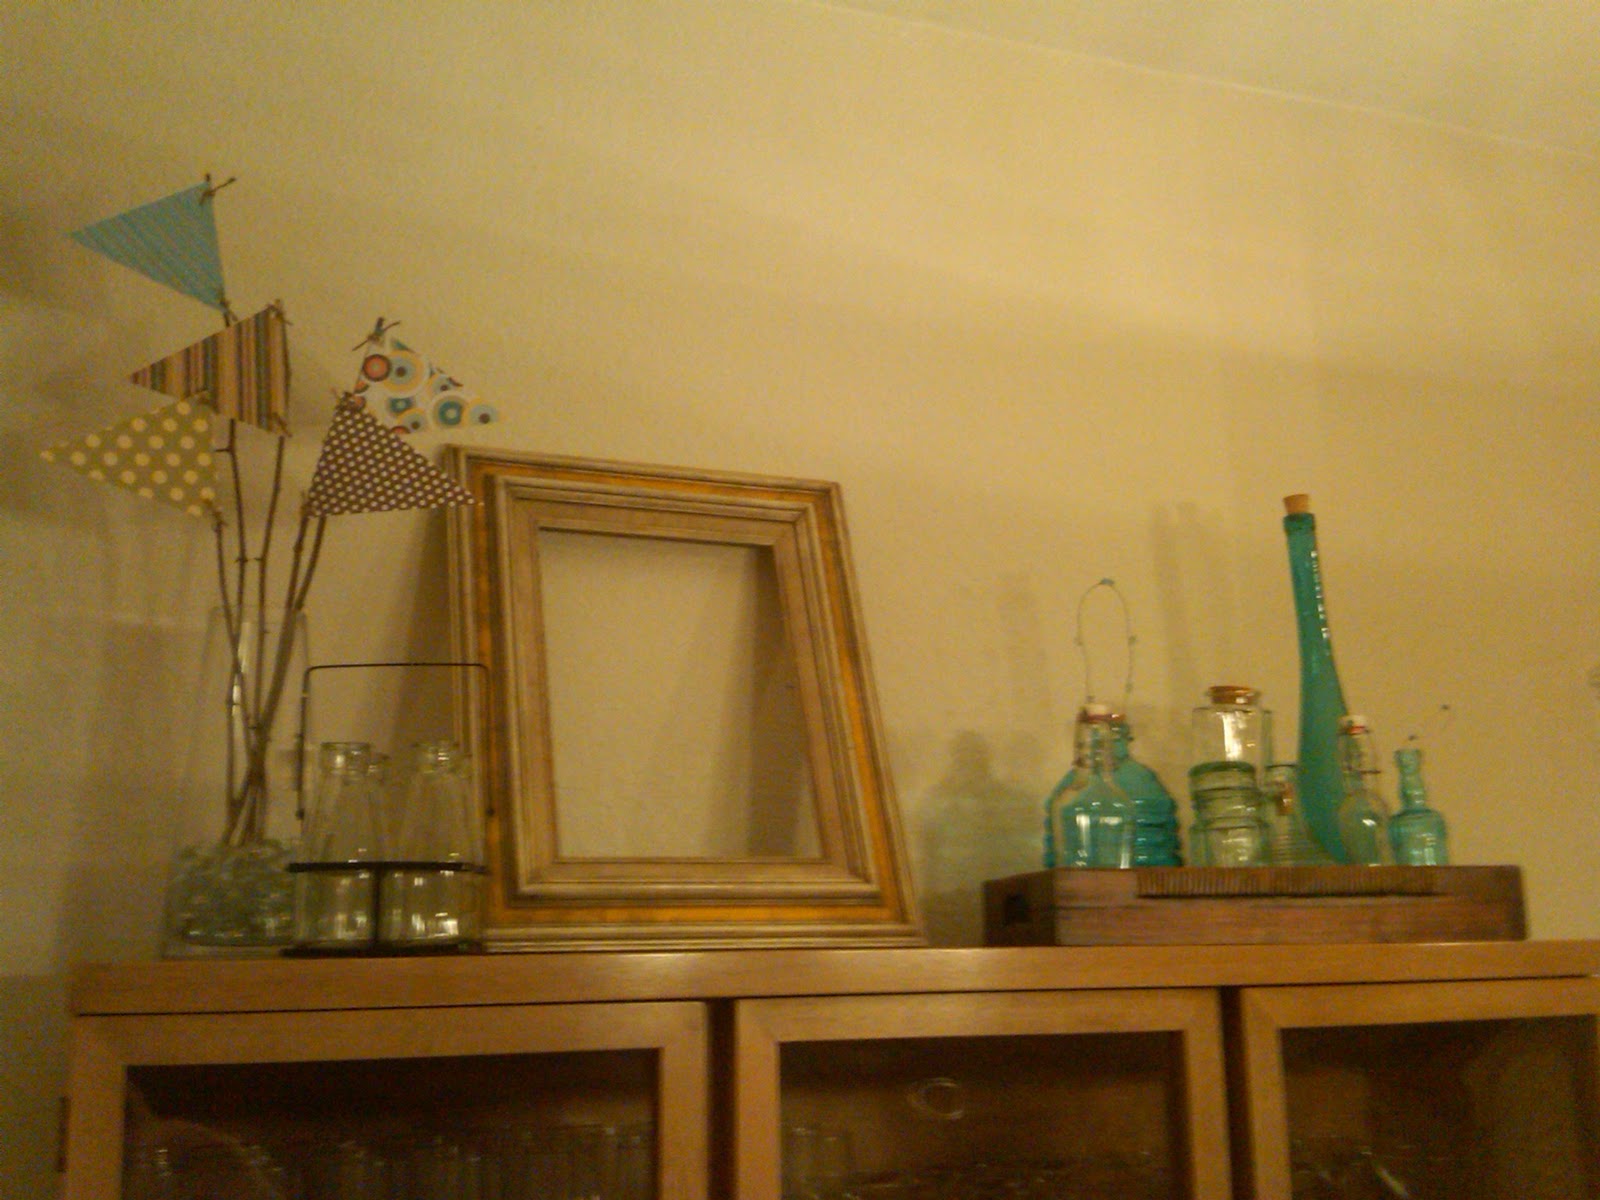
Well the top of my hutch looked like this (see below) - I didn't love the flowers as I didn't think they went, so I wanted to create something to go in its place, but still utilize the vase - something other than a floral arrangement as fake flowers are not my fave.


BEFORE

I saw a photo online which led me to the idea of pennants on sticks, so here is the after photo below (I did this quickstyle last night).  What do you think, do you like the before or after better?


AFTER

SUPPLIES
- 5 complimentary patterned papers 6x6 or larger will work for this project - keep in mind that if you are using this as a centerpiece rather than against a wall, the papers will need to be double sided
- 5 twigs/sticks - i liked the natural look of the twigs - i purchased a bundle of twigs at michaels, cut off the wire holding the bundle together and trimmed them to the size i wanted them to be
- wire cutters or similar - basically something heavy duty to trim your twigs so they will be the height you desire
- vase
- something to fill the bottom of your face with - i used clear marbles, other ideas are stones, nuts, seeds, moss, etc. 
- cropodile or hole punch
- twine or ribbon
- paper cutter

STEP ONE: cut your paper too be 4.5" by 5.5".  Then mark with a pencil on the 4.5" side a dot at the 2.25" mark - angle your paper cutter to cut from one corner to the 2.25" mark you just made on both sides to create a pennant - I chose this size due to the size of my vase - you may make smaller or larger depending on your vase size - i recommend the width being 1" bigger than the height as I feel that made the proportions look correct.

STEP TWO: use your cropodile or hole punch to punch a hole in both corners of your straight edge

STEP THREE: use your twine to tie both corners to your twig/stick

STEP FOUR: have 3 of your flags point one direction and 2 point the other - trim your twigs to desired varying heights and display in your vase as desired.

VOILA! Easy cheesy :) Hope you enjoyed the super simple tutorial.
** I will attempt to get a close-up photo tonight and add to this post as requested.

Let me know what you think of my hutch - do you like the flowers or pennants best?

Monday, September 26, 2011

Dining Room Table

I am hosting a prospective members Bunco party at my house for my local Junior League on Wednesday.  I will be setting up card tables in my currently empty living room for the event - I guess there are pros to having a completely empty room - ha!

I wanted to showcase some of my china and dinnerware as I never get to, so I decided to set up my dining room table with my china and crystal just to show it off a little at my party. 


It's not in any way perfect, but I am pleased with how it turned out.  We still need to stain and update the hardware on the hutch in the background that we got from Craigslist, and I still am looking for some items to hang on my gate looking thing on the left wall.  I also still need the crystal iced beverage glasses to complete the place setting, but hey, it's a start!  This is our dining room table with all of our leaves in - our $30 garage sale find dining room table :) We also need to stain the table - but that is masked by the tablecloth.

Again, I apologize for the poor photo quality - perhaps I should take some photography classes? 

Happy Monday!

Tuesday, March 22, 2011

Tutorial Tuesdays - home decor

In case you've noticed, I'm on a home decor kick as the hubs and I work on decorating our home; therefore, today's Tutorial Tuesday will feature some neat-o home decor DIY tutorials that I have come across and just had to share.  Most of these I have already shared on my crafting forum Miss Imagination, that I run with my dear friend Jen, but not everyone who reads may belong to that forum, so I thought I would share here as well.  Enjoy!!

Check out these gorgeous glass colored vases! I have picked up quite a few at yard sales for a quarter a piece since reading this fab tutorial (found here) on Starshine Chic's blog.  I just need to pick up some crafting paint the next time I hit up Michael's (or even Walmart) so I can try this out! ps: If you check out my last garage sale finds post you will see I picked some up this past weekend!

(photo courtesy of Starshine Chic)

So ya, when I saw this next tutorial my jaw practically hit the floor.  Look how AMAZING this faux metal wall art looks (check out the tutorial here).  You will NEVER guess what it's made from without checking out the tutorial (hint - it's not metal).  I am seriously blown away at the craftiness and sheer amazingness from Suzy's Artsy Craftsy Sitcom. I would LOVE to try this, I just have to find the patience.

(photo courtesy of Suzy's Artsy Craftsy Sitcom)

This is such a cute (and easy) craft! Best yet, you can find 2 plates you love and make something that matches your kitchen, or theme exactly! Most tiered stands are so plain, but not this one! Way cool! Check out the tutorial here from Two Shades of Pink.  This girl is so crafty!

(photo courtesy of Two Shades of Pink)

That's all for today folks, although the Internet has TONS more of these amazing home decor crafts for you to find and complete as well.  Unfortunately I haven't had the opportunity to try any of these quite yet, but they're all in my nifty "Crafts I wanna complete" folder on my home computer :)

Enjoy!

Saturday, February 26, 2011

Home Renovation: Master Bedroom Progress

Here is yet another post documenting the progress of our new home. 

When we first looked at the house we are currently in (when the prior owners were still living there), the master bedroom was empty.  However it was evident we would need to immediately replace the floor as the carpet was soiled from their pets and smelled.  We also would need to paint.  The prior owners had a relatively neutral primary paint color, but the accent wall was burgundy.  Our bedding was tropical - lime greens and teals, so the burgundy would not blend. 

Here is what the house looked like when we first looked at the house (prior owners still living there):


(you can kinda sorta see the blue nasty carpet here)

(the burgundy wall - all of those white spots were random holes we had to fill in???)

Here is after the new flooring was put in and we had painted the walls - we also did not have furniture at this point and were sleeping on a trundle bed, jealous? LOL.


(temporary bedding only, I realize it doesn't match)

(my vision was that the accent wall would be a different shade of green, which it is, but I don't love it)

Here is what it currently looks like (yay furniture):


We still have a ways to go with more decor needed, a television, blinds/shutters, etc.  I will keep you posted as we continue to work on our home.

Wednesday, February 23, 2011

Operation Home Security

In light of the recent burglary at my residence, Timmy and I have decided to revamp our security at home.

Alarm - Check.  This was already in place and the key reason why we were fortunate enough not to be cleaned out.  We have asked for additional stickers to put on each and every window.  Although we had a sign up in the front yard, that did not stop the burglars from selecting our home, perhaps if they are reminded by a sticker at all possible entrances they will think twice before trying again.

Siren - our neighbors indicated they heard nothing.  We installed this siren which is so completely ear piercing Hellen Keller might be able to hear it.  Okay that was a politically incorrect joke, but you get my point.  This is being installed.

Window locks - these cheap but handy little buggers from Home Depot that basically don't allow you to slide open the window, instead they would have to break the window which could draw more attention. These have been purchased and implemented.

Blinds/shutters - yep, we didn't have them in all the windows yet.  We've been talking about it, but had been putting it off as we did other home repairs and purchases that we wanted more.  Well, these are needed, so we met with a blinds company over the weekend and we are now proud owners of new blinds/shutters.  I will be posting photos once they are installed - some this weekend and the shutters not for a few more weeks.

Curtains - I need to measure our slider and get the dimensions so that I can have curtains made.  This is my goal in the next few weeks.  Will post pictures once they are up. 

We are going to add a few more locks and precautions to our garage doors as well.

We also went around and exchanged numbers with a few more of our neighbors.  Unfortunately where we live (not sure if it's only like this in SoCal), neighbors don't necessarily get to know each other.  In fact, we hardly see most of our neighbors and only about 3 have introduced themselves to us since we moved in over 6 months ago. 

What do you do to make sure your home is secure? Share your ideas here! 

Saturday, February 19, 2011

Home Renovation: Kitchen progress

So when Tim and I first had a tour of our current house, when the prior owners were still living in it (with all of their ish), it looked like this (yikes):


Ya, I dunno.  It was a really weird set-up.

After the previous owners moved out and we were able to get rid of all of their stuff, we were ready to paint.  I know some people have red, we just don't love red, not our color, not our style, and didn't really go with the rest of the house or the kitchen IMHO (in my humble opinion).

Here is Tim taping off the kitchen getting ready to paint.


We ended up just painting it to match the rest of the walls - a pretty neutral color.  Here was an update after painting - oh that's me in the kitchen.  Be sure to catch this rare glimpse (rare being me in the kitchen)! haha.


I know you're seeing the 2 microwaves and thinking, "What the heck? you guys must really like microwavable dinners".  No.  The prior owners failed to mention the microwave was broken.  Luckily Tim had a countertop one that we could use in the interim. 

Since that time we have gotten a new microwave (on a killer black Friday deal btw).  I also got gorgeous barstools from Santa featured in this photo as well.  Here is how the kitchen appears now:


We still obviously have a lot of work to do.  I would still like to get a new fridge (stainless) to match the stove and microwave (ours is temperamental and decides to leak randomly).  The dishwasher is black, but whatever.  I would like to paint the cabinets - probably dark.  I would eventually also like to get granite counters.  And SOMEDAY I would like to change the whole layout of the kitchen as the pantry being right behind the garage door is very inconvenient.  It will be baby steps though.  First step will be the fridge. 

Just wanted to provide some photos of the progress we have made in our new house (which we moved into in July).  Thanks for looking.  I will be posting pics on various aspects of our house as we work on them.  I know it'll never be done, and it's definitely a SLOW process!