Showing posts with label Tutorial Tuesdays. Show all posts
Tuesday, October 25, 2011
Tutorial Tuesday - Chinese Chicken Morsels
The hubs and I tried out a new recipe last night and it was too delicious not to share.
History: the hubs and I are on a budget trying to pay down our debt to secure our future, soooo.... we are trying to figure out ways to save in areas such as groceries. We found a book at a yard sale called "Once a Month Cooking" which basically is a plan for you to cook one day a month (and shop one day a month), make various foods out of one set of supplies/groceries, and then freeze the food to cook later that month. I don't want to make large amounts of any recipe we have never tried, so we are trying out a few of the recipes to see if we like them first.
The first recipe we tried was this one, called Chinese Chicken Morsels.
Serves 4
Ingredients:
- 1 lb. boneless skinless chicken breast
- 1/2 cup lemon juice
- 1/4 cup soy sauce (we use La Choy which is gluten free)
- 1/4 cup dijon mustard
- 2 teaspoons of vegetable oil
- 1/4 teaspoon of cayenne pepper
- 1 cup of regular uncooked rice
Steps:
1) Combine all ingredients except chicken and rice, mix thoroughly.
2) Cut chicken into one inch cubes
3) a: If you are eating this the same night or the following day, put chicken into marinade bowl and let sit for at least 30 minutes. b: if you are freezing, put chicken and marinade in a one gallon ziplock and freeze
Cooking/to Serve:
1) If frozen, thaw out marinade.
2) Remove chicken from marinade and place evenly on a broiler pan. Broil for 7 minutes placed about 4-5 inches from the flame. Remove from oven, turn each piece over and brush with marinade. Broil for additional 4 minutes.
3) Meanwhile, put marinade into small saucer and heat up (note - this is do at your own risk as it did contain uncooked chicken - I did this step at simply brought to a boil and then simmered for a bit to ensure that it would be safe to eat).
4) Cook rice according to packaging.
5) Spoon rice onto plate, cover with chicken and pour marinade onto dish for extra flavor.
This was easy and delicious. The hubs made me promise that I will make it again. Here is a pic (courtesy of my super spectacular image quality cell phone - ha!). Enjoy!
If you try out this recipe, be sure to post a comment and let me know what you thought!
Tuesday, September 27, 2011
Tutorial Tuesday - super simple pennant centerpiece
Well I am doing a tutorial today (I know I actually crafted something OMG!) - but I forgot to take photos of the steps - so it will be a written tutorial. My bad!
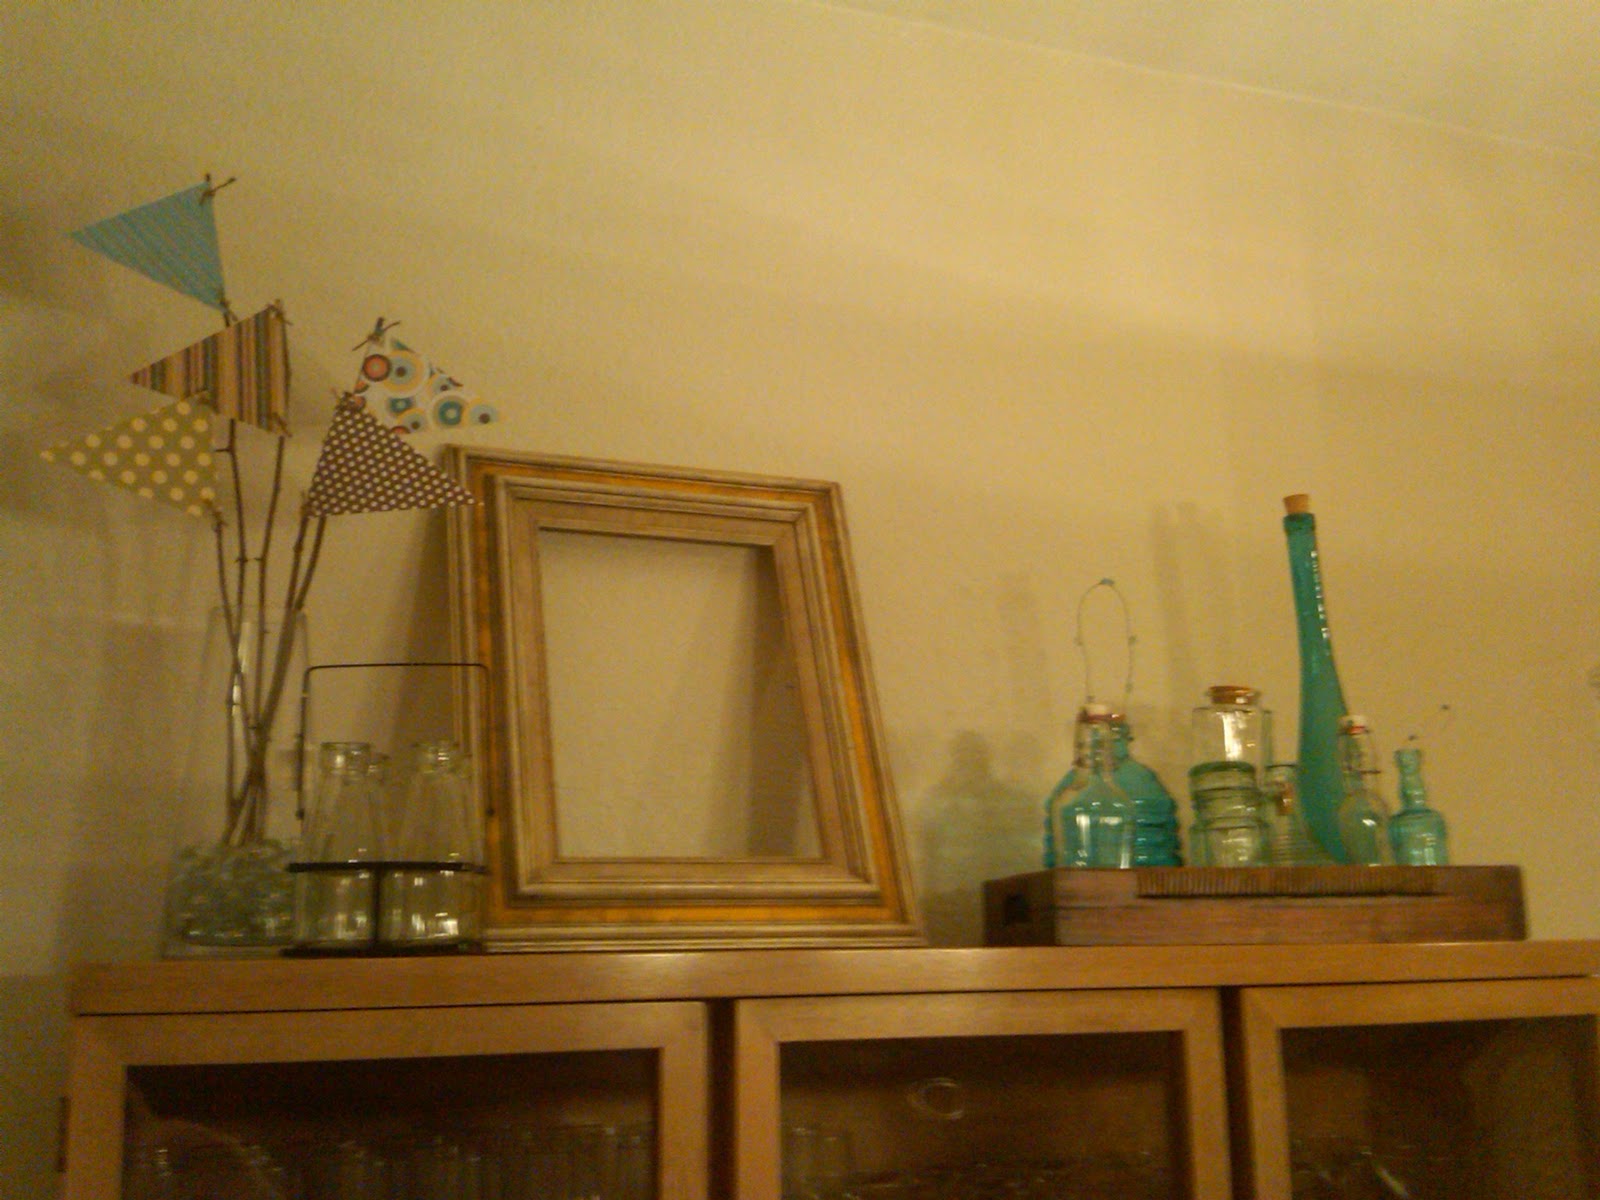
Well the top of my hutch looked like this (see below) - I didn't love the flowers as I didn't think they went, so I wanted to create something to go in its place, but still utilize the vase - something other than a floral arrangement as fake flowers are not my fave.
BEFORE
I saw a photo online which led me to the idea of pennants on sticks, so here is the after photo below (I did this quickstyle last night). What do you think, do you like the before or after better?
AFTER
SUPPLIES
- 5 complimentary patterned papers 6x6 or larger will work for this project - keep in mind that if you are using this as a centerpiece rather than against a wall, the papers will need to be double sided
- 5 twigs/sticks - i liked the natural look of the twigs - i purchased a bundle of twigs at michaels, cut off the wire holding the bundle together and trimmed them to the size i wanted them to be
- wire cutters or similar - basically something heavy duty to trim your twigs so they will be the height you desire
- vase
- something to fill the bottom of your face with - i used clear marbles, other ideas are stones, nuts, seeds, moss, etc.
- cropodile or hole punch
- twine or ribbon
- paper cutter
STEP ONE: cut your paper too be 4.5" by 5.5". Then mark with a pencil on the 4.5" side a dot at the 2.25" mark - angle your paper cutter to cut from one corner to the 2.25" mark you just made on both sides to create a pennant - I chose this size due to the size of my vase - you may make smaller or larger depending on your vase size - i recommend the width being 1" bigger than the height as I feel that made the proportions look correct.
STEP TWO: use your cropodile or hole punch to punch a hole in both corners of your straight edge
STEP THREE: use your twine to tie both corners to your twig/stick
STEP FOUR: have 3 of your flags point one direction and 2 point the other - trim your twigs to desired varying heights and display in your vase as desired.
VOILA! Easy cheesy :) Hope you enjoyed the super simple tutorial.
** I will attempt to get a close-up photo tonight and add to this post as requested.
Let me know what you think of my hutch - do you like the flowers or pennants best?
Tuesday, August 9, 2011
Tutorial Tuesdays - a diaper cake
I know that I have posted diaper cake ideas in the past - but as I was making my dear friend, Christy's, diaper cake back in June, I decided to take a few photos along the way and do a mini tutorial for all of you faithful readers :)
Supplies
1 large bottle of johnson and johnson baby powder - or any brand, I just use this as its a preferred brand among most moms
A small round medium sized object such as a medium sized bottle, or bath wash, etc. for your top layer
2 large glue dots, foam adhesive, etc. to adhere the layers
1 box (80 count) of Pampers Swaddlers Size 2 - I use these because they have the least color on them so that your cake appears white, and most people get size 1 as gifts, so this way you know yours will be used for sure - both ladies I have made cakes for have thanked me for giving size 2 instead of 1.
Cake plate - cardboard or plastic, 10" or 12"
Rubberbands - lots of them, the normal size, not super large or small, brown so it doesn't draw attention just in case your cover doesn't cover them all the way
6 extra large rubber bands to hold each layer together
pearl head pins (this is what I use to pin the items on)
topper - something to top your "cake" with to tie in your theme
1 bag of raffia (any color) - I use this to add a little more texture to my cake by putting it between each layer.
Ribbon/receiving blankets/designer paper, etc. to cover your rubberbands - I use a combo of ribbon and receiving blankets, but may try paper in the future
goodies - goodies to adhere to your cake, they should be small, socks, pacifiers, gift cards, small toys, washclothes, etc. Anything too large will distract from your cake and cover your masterpiece!
Instructions
1) Adhere your powder to the cake plate using a glue dot or foam adhesive. Adhere your smaller object such as a bottle on top of the powder bottle using the same thing.
2) Roll your diapers. Diapers should be laid out flat on their back sides (like you were going to place it on a baby) and rolled tightly from one end to the other. Then secure the roll by wrapping a rubberband around the middle of each diaper - do not wrap too snuggly so that it distorts the shape of your diaper.
3) Start with your base layer by placing diapers one by one in a circle around the powder bottle - diapers should all face the same way, seam in (towards the powder). Your bottom layer should have 3 layers of diapers (so 3 rings around the bottle). Secure each ring should be rubberbanded using one of the extra large rubberbands.
This photo is an example of one ring around the powder bottle for my base layer.
4) Once your base layer is completed, begin your second layer, which will have 2 rings. (Note, It also helps to drink a margarita while you assemble these assuming you are not expecting yourself, as you may notice in the back left of my photo, HA!).
Base and second layer assembled.
5) Assemble the third layer as described above with only one ring of diapers.
6) Here is where I add the raffia between by base and second layers and second and top layer. I find it easier to add at this point so that you can tuck it in and it easily stays in place without any additional adhesive or supplies.
7) You know will cover the rubberbands by wrapping either ribbon, decorative paper, receiving blankets, etc., or a combination thereof around each layer. Generally by bottom layer is too large for the average receiving blanket, so I use ribbon on the bottom layer.
8) Decorate your "cake" with the goodies by adhering them with pearl head pins or ribbons. Make sure they are small and do not detract from your cake.
9) Add your cake topper and voila! DONE!
I hope you all enjoyed my mini tutorial, and feel free to check out my girls version of my diaper cake here.
And a bonus photo of the shower invitation I made for the same shower, which was rubber ducky themed - simple but fun (IMO):
Oh and more photos from the shower taken by other people who attended:
My friend Jen made the cookies, aren't they adorable!?
I also made the little silverware holder. Geez I love my Cricut.
Labels:
baby,
crafts,
diaper cake,
DIY,
Tutorial Tuesdays
Tuesday, April 12, 2011
Tutorial Tuesday - Wooden Pallets
I'm so sorry I've been slacking on the Tutorial Tuesday's. It's been a few very busy weeks for me. Things seemed to have calmed down some, so I'm back at it. Yay.
Well, as I've mentioned many, many times, my current family room is empty. Completely empty. I saw some fabulous furniture using wooden pallets and I think I just may go for it - to create a modern, industrial, yet chic vibe. We will see. The first step will be in finding affordable yet still in good condition pallets. I have yet to find those.
In the spirit of my wooden pallet quest, I thought I would share today a few tutorials on re purposing wooden pallets - which I think are WAY cool by the way!
First up is this terrific and versatile shelf. Pretty cool, right!?
Next up is this amazing coffee table. There are a lot of variations of wooden pallet coffee tables - just google it and you can find one to suit your own taste. I like this one a lot - although I may leave mine in a more natural wood tone.
This vegetable planter. Again there are a TON of planter ideas using pallets online, so check em out to find one you link, I like this simple one, plus I like that hte link includes a PDF with instructions :)
Check out this book! I must get my hands on this!
There are plenty more on the Internet and I'm not entirely certain what my wooden pallet get-up will entail - I suppose it depends on how many quality pallets I can come up with.
As always, thanks for reading!
Tuesday, March 22, 2011
Tutorial Tuesdays - home decor
In case you've noticed, I'm on a home decor kick as the hubs and I work on decorating our home; therefore, today's Tutorial Tuesday will feature some neat-o home decor DIY tutorials that I have come across and just had to share. Most of these I have already shared on my crafting forum Miss Imagination, that I run with my dear friend Jen, but not everyone who reads may belong to that forum, so I thought I would share here as well. Enjoy!!
Check out these gorgeous glass colored vases! I have picked up quite a few at yard sales for a quarter a piece since reading this fab tutorial (found here) on Starshine Chic's blog. I just need to pick up some crafting paint the next time I hit up Michael's (or even Walmart) so I can try this out! ps: If you check out my last garage sale finds post you will see I picked some up this past weekend!
So ya, when I saw this next tutorial my jaw practically hit the floor. Look how AMAZING this faux metal wall art looks (check out the tutorial here). You will NEVER guess what it's made from without checking out the tutorial (hint - it's not metal). I am seriously blown away at the craftiness and sheer amazingness from Suzy's Artsy Craftsy Sitcom. I would LOVE to try this, I just have to find the patience.
This is such a cute (and easy) craft! Best yet, you can find 2 plates you love and make something that matches your kitchen, or theme exactly! Most tiered stands are so plain, but not this one! Way cool! Check out the tutorial here from Two Shades of Pink. This girl is so crafty!
That's all for today folks, although the Internet has TONS more of these amazing home decor crafts for you to find and complete as well. Unfortunately I haven't had the opportunity to try any of these quite yet, but they're all in my nifty "Crafts I wanna complete" folder on my home computer :)
Enjoy!
Check out these gorgeous glass colored vases! I have picked up quite a few at yard sales for a quarter a piece since reading this fab tutorial (found here) on Starshine Chic's blog. I just need to pick up some crafting paint the next time I hit up Michael's (or even Walmart) so I can try this out! ps: If you check out my last garage sale finds post you will see I picked some up this past weekend!
(photo courtesy of Starshine Chic)
So ya, when I saw this next tutorial my jaw practically hit the floor. Look how AMAZING this faux metal wall art looks (check out the tutorial here). You will NEVER guess what it's made from without checking out the tutorial (hint - it's not metal). I am seriously blown away at the craftiness and sheer amazingness from Suzy's Artsy Craftsy Sitcom. I would LOVE to try this, I just have to find the patience.
(photo courtesy of Suzy's Artsy Craftsy Sitcom)
This is such a cute (and easy) craft! Best yet, you can find 2 plates you love and make something that matches your kitchen, or theme exactly! Most tiered stands are so plain, but not this one! Way cool! Check out the tutorial here from Two Shades of Pink. This girl is so crafty!
(photo courtesy of Two Shades of Pink)
That's all for today folks, although the Internet has TONS more of these amazing home decor crafts for you to find and complete as well. Unfortunately I haven't had the opportunity to try any of these quite yet, but they're all in my nifty "Crafts I wanna complete" folder on my home computer :)
Enjoy!
Tuesday, March 8, 2011
Tutorial Tuesdays - DIY Wreaths
I recently purchased a plain wreath at a yard sale for 50 cents and have been thinking about what I want to do with it, so this edition of Tutorial Tuesdays will be about DIY wreaths.
Enjoy!
1) Using a Styrofoam base, create this adorable Curly Ribbon Wreath.
2) Elegant fabric wreath - can make for any holiday or just as general decor!
3) A great natural looking wreath - you can easily use spring colors and make it a spring wreath too!
4) Adorable moss wreath - love this!
5) Fun and bright flower wreath.
If you have a fun wreath tutorial, be sure to provide a link below, or even a link to a wreath you made! I'm gathering ideas and hope to make one in the next few weeks :)
Enjoy!
1) Using a Styrofoam base, create this adorable Curly Ribbon Wreath.
2) Elegant fabric wreath - can make for any holiday or just as general decor!
3) A great natural looking wreath - you can easily use spring colors and make it a spring wreath too!
4) Adorable moss wreath - love this!
5) Fun and bright flower wreath.
If you have a fun wreath tutorial, be sure to provide a link below, or even a link to a wreath you made! I'm gathering ideas and hope to make one in the next few weeks :)
Tuesday, March 1, 2011
Tutorial Tuesdays
It's Easter time!!! Okay, not yet, but if you want to be crafty this Easter you have probably already started collecting some ideas. I wanted to share a few Easter themed tutorials with you all today.
Surprise Eggs
I found these fun "surprise eggs" on a site called Not Martha (haha I love it!). Basically it's the idea of the plastic Easter Eggs filled with goodies, but using real eggs. Pretty cool eh? She gives a great tutorial, so check it out.
Marbelized Easter Eggs
These are a unique way to dye your eggs (if you do them yourself like we do) this Easter. I think they turn out quite lovely!
Yarn Eggs
This is such a fun craft - maybe also something you can do with your kids? I love the ones that she has hanging on her outdoor trees - what a fun yard decoration!
Easter Bunny Garland
I love the idea of creating your own garland from your paper inventory at home. Here is an idea from Martha Stewart (I do love her). One of my FAVORITE sites of all times (Hostess with the Mostess) has their own version of the bunny garland as well which you can find here.
Easter Centerpiece
I love love love this Easter centerpiece (also from Hostess with the Mostess). Isn't it so bright, cheery, and gorgeous!?
Edible (chocolate) birds' nest
This is such a cute dessert idea and just a lovely display!
Do you have your own Easter tutorial you'd like to share? Provide a link below, I'd love to check it out!
Surprise Eggs
I found these fun "surprise eggs" on a site called Not Martha (haha I love it!). Basically it's the idea of the plastic Easter Eggs filled with goodies, but using real eggs. Pretty cool eh? She gives a great tutorial, so check it out.
Marbelized Easter Eggs
These are a unique way to dye your eggs (if you do them yourself like we do) this Easter. I think they turn out quite lovely!
Yarn Eggs
This is such a fun craft - maybe also something you can do with your kids? I love the ones that she has hanging on her outdoor trees - what a fun yard decoration!
Easter Bunny Garland
I love the idea of creating your own garland from your paper inventory at home. Here is an idea from Martha Stewart (I do love her). One of my FAVORITE sites of all times (Hostess with the Mostess) has their own version of the bunny garland as well which you can find here.
Easter Centerpiece
I love love love this Easter centerpiece (also from Hostess with the Mostess). Isn't it so bright, cheery, and gorgeous!?
Edible (chocolate) birds' nest
This is such a cute dessert idea and just a lovely display!
Do you have your own Easter tutorial you'd like to share? Provide a link below, I'd love to check it out!
Tuesday, February 22, 2011
Tutorial Tuesdays
I am wild about mini albums. I love to scrapbook but often struggle to come up with creative layouts, etc. I have gotten into mini albums, they're awesome because they set the theme for you and are on a much smaller scale. They also make FABULOUS gifts.
I thought today's tutorials could be all about my favorite mini album styles. There are infinite ideas out there, but here are some of my faves.
An inexpensive and simple mini album - toilet paper roll mini album.
A gorgeous tri fold mini album (which can also be an elaborate card) - note it's a video tutorial. To see a sample of the finished product go here.
Exploding Box mini album tutorial - I just adore this and think it would be such a fun gift!
This is an adorable mini album using coaster.
I have never tried this particular style of a coaster album, but I did make a simple coaster album for Timmy which you can take a look at here (I included a tutorial of how to make my own coaster album in that link). I didn't add any photos to mine, but of course you can :)
Do you have a specific style of mini albums that you just love making? Share a link to it in the comments below!
I thought today's tutorials could be all about my favorite mini album styles. There are infinite ideas out there, but here are some of my faves.
An inexpensive and simple mini album - toilet paper roll mini album.
A gorgeous tri fold mini album (which can also be an elaborate card) - note it's a video tutorial. To see a sample of the finished product go here.
Exploding Box mini album tutorial - I just adore this and think it would be such a fun gift!
This is an adorable mini album using coaster.
I have never tried this particular style of a coaster album, but I did make a simple coaster album for Timmy which you can take a look at here (I included a tutorial of how to make my own coaster album in that link). I didn't add any photos to mine, but of course you can :)
Do you have a specific style of mini albums that you just love making? Share a link to it in the comments below!
Tuesday, February 15, 2011
Tutorial Tuesdays
Baby time! Okay, not for me (yet), but I have 2 dear friends that are pregnant. The first baby shower is less than a month away (the one for whom I made the baby shower cards - you can see them in my prior blog post here). I am considering (don't hold me to it yet) doing a diaper cake or wreath or something similar, so I've been surfing around the Internet for ideas and thought I would put up a list of some awesome tutorials I came across for your viewing pleasure.
3 tiered easy-to-follow diaper cake tutorial - here.
Diaper wreath - here.
Baby bunny basket - here.
For you paper crafters out there you can definitely incorporate paper crafting into this idea as shown - here.
Champagne bottle center diaper cake - here. I love this idea - the parents deserve a little something after the baby is born after all right?
And finally some cute ideas on themed diaper cakes - here.
Have any of you ever made a diaper cake? What did you do to make it extra special? Leave me a comment and tell me about it or link me to your photo, I'd love to take a look!
As always, thanks for reading :)
3 tiered easy-to-follow diaper cake tutorial - here.
Diaper wreath - here.
Baby bunny basket - here.
For you paper crafters out there you can definitely incorporate paper crafting into this idea as shown - here.
Champagne bottle center diaper cake - here. I love this idea - the parents deserve a little something after the baby is born after all right?
And finally some cute ideas on themed diaper cakes - here.
Have any of you ever made a diaper cake? What did you do to make it extra special? Leave me a comment and tell me about it or link me to your photo, I'd love to take a look!
As always, thanks for reading :)
Tuesday, February 8, 2011
Tutorial Tuesdays
Who doesn't love tutorials? When it comes to making stuff it's much easier to read about and learn from other people's mistakes than to make them yourself. Also, it appears that other people are far more creative than myself. Ideas don't always simply pop into my head. Oftentimes I have to look at an idea from someone and think about how I would modify their idea to make it my own. I just love love love tutorials.
Sometimes these tutorials will be something that I come up with, but more often than not it will be links to other fabulous tutorials I have found while surfing the web.
It may be one, it may be ten. Depends on my mood (and time).
Most, if not all of these tutorials, will be crafting, but as my husband and I work on the house we may get into some home improvement tutorials as well and maybe I will throw in a recipe or 2. Cooking a meal can be a tutorial too you know!
So without further ado, I will kickoff my first Tutorial Tuesday!
Today's theme will be fabulous tutorials I have found that involve Love or Valentine's Day.
Inexpensive yet fabulous Craft:
Love in a bottle: http://ohsnaplizzie.blogspot.com/2011/02/special-love-day-diy.html
Edible Craft/Recipe:
Conversation Heart chocolate bark: http://bakeat350.blogspot.com/2011/02/valentine-conversation-heart-chocolate.html
Sew cute:
Reversible Love Table Runner: http://craftytammie.blogspot.com/2011/02/valentines-day-reversible-table-runner.html
Paper craft:
Valentine's Day Candy Boxes: http://www.thehybridchick.com/2011/02/valentines-day-candy-boxes/
Kids craft:
Pop-up heart garden Valentine: http://www.enchantedlearning.com/crafts/valentine/heartgarden/
Hope you enjoyed the first rendition of Tutorial Tuesdays! Check back next week for more awesome tutorials from around the web!
Sometimes these tutorials will be something that I come up with, but more often than not it will be links to other fabulous tutorials I have found while surfing the web.
It may be one, it may be ten. Depends on my mood (and time).
Most, if not all of these tutorials, will be crafting, but as my husband and I work on the house we may get into some home improvement tutorials as well and maybe I will throw in a recipe or 2. Cooking a meal can be a tutorial too you know!
So without further ado, I will kickoff my first Tutorial Tuesday!
Today's theme will be fabulous tutorials I have found that involve Love or Valentine's Day.
Inexpensive yet fabulous Craft:
Love in a bottle: http://ohsnaplizzie.blogspot.com/2011/02/special-love-day-diy.html
Edible Craft/Recipe:
Conversation Heart chocolate bark: http://bakeat350.blogspot.com/2011/02/valentine-conversation-heart-chocolate.html
Sew cute:
Reversible Love Table Runner: http://craftytammie.blogspot.com/2011/02/valentines-day-reversible-table-runner.html
Paper craft:
Valentine's Day Candy Boxes: http://www.thehybridchick.com/2011/02/valentines-day-candy-boxes/
Kids craft:
Pop-up heart garden Valentine: http://www.enchantedlearning.com/crafts/valentine/heartgarden/
Hope you enjoyed the first rendition of Tutorial Tuesdays! Check back next week for more awesome tutorials from around the web!
Subscribe to:
Posts (Atom)